
Step-by-Step Instructions
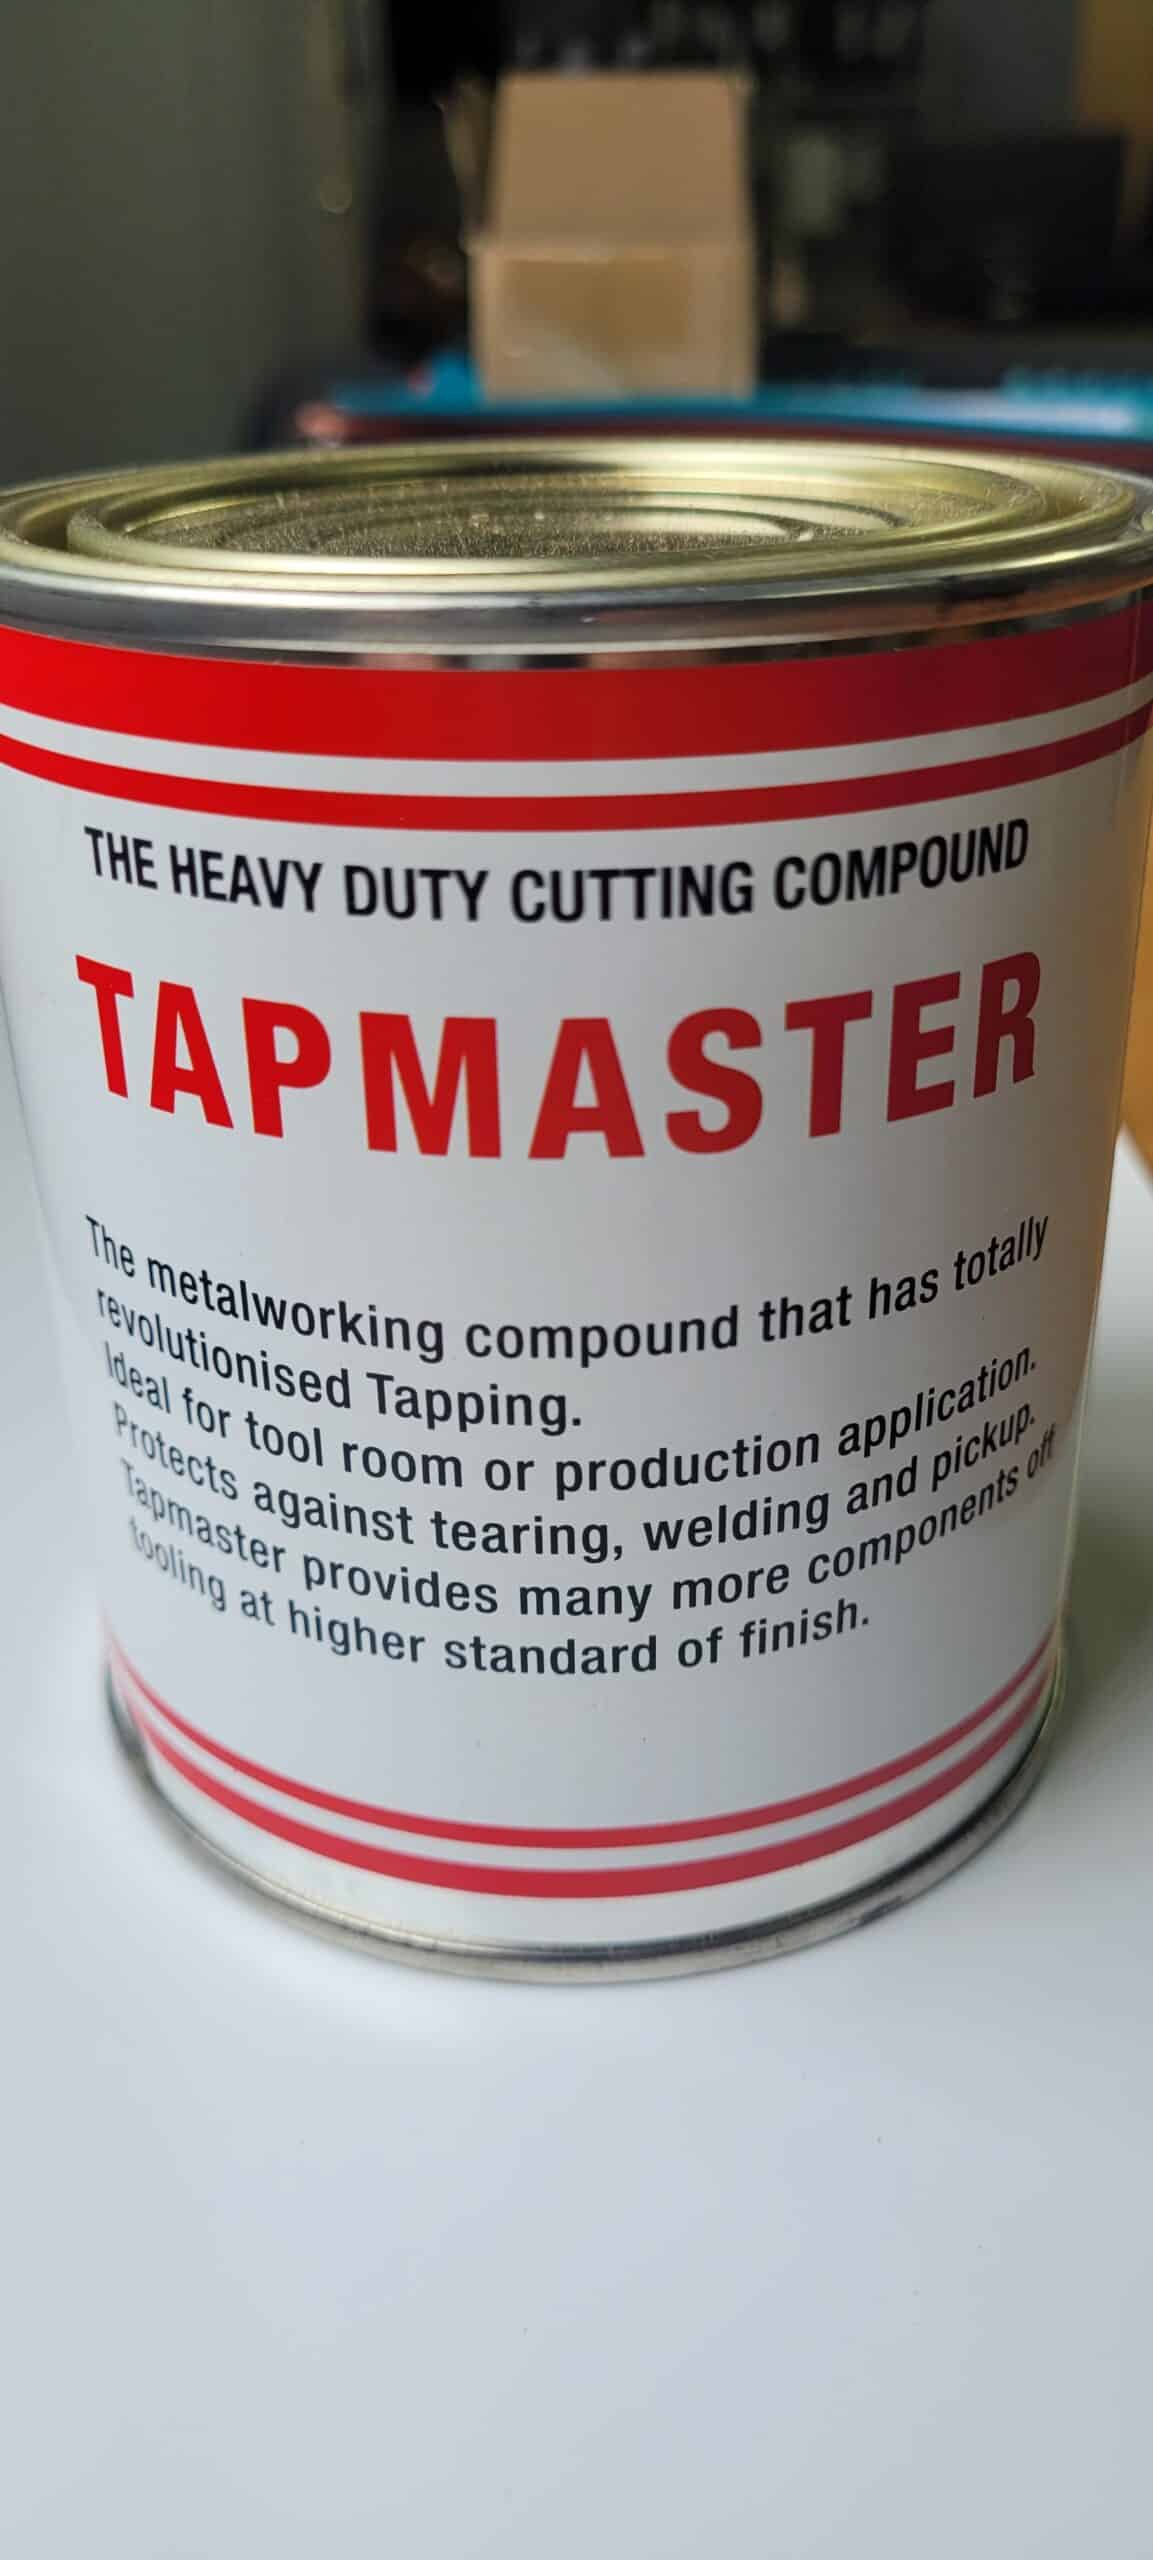
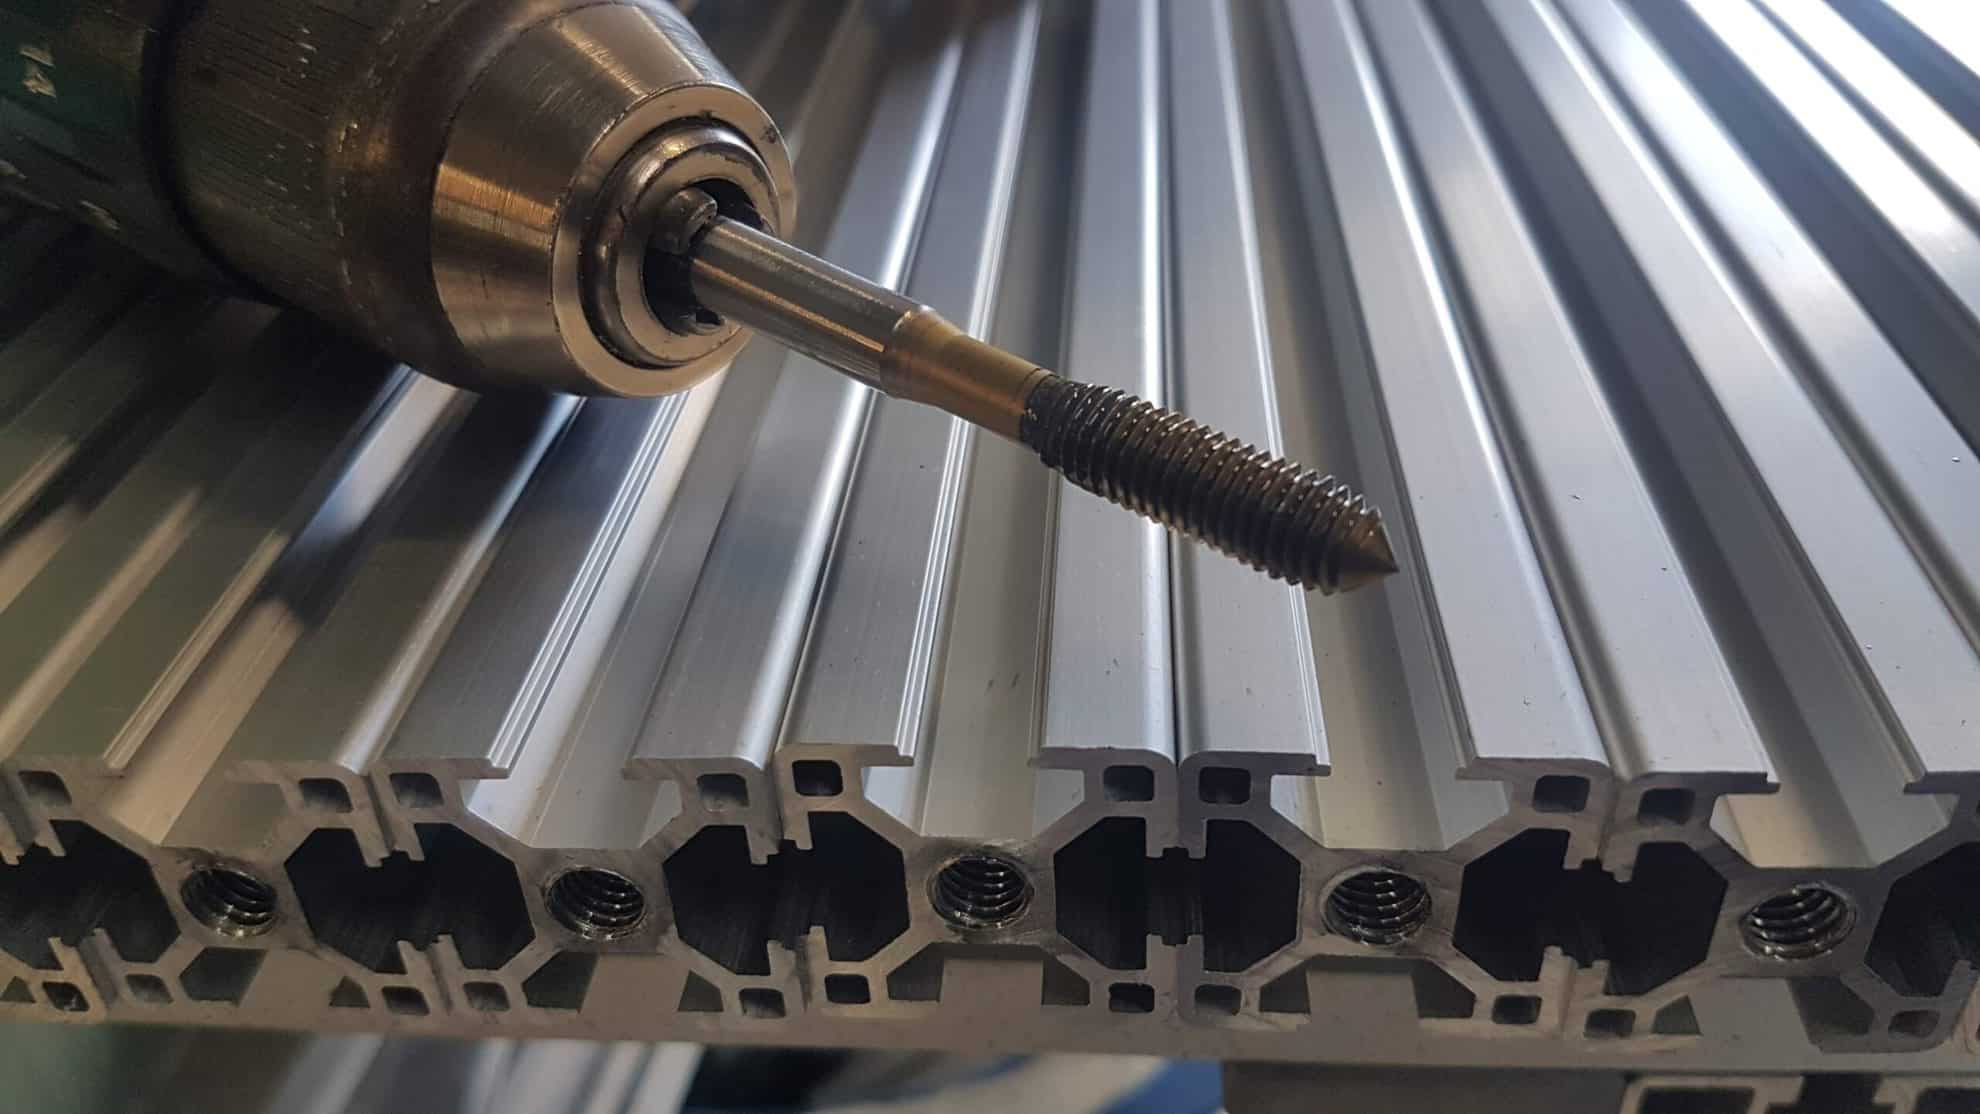
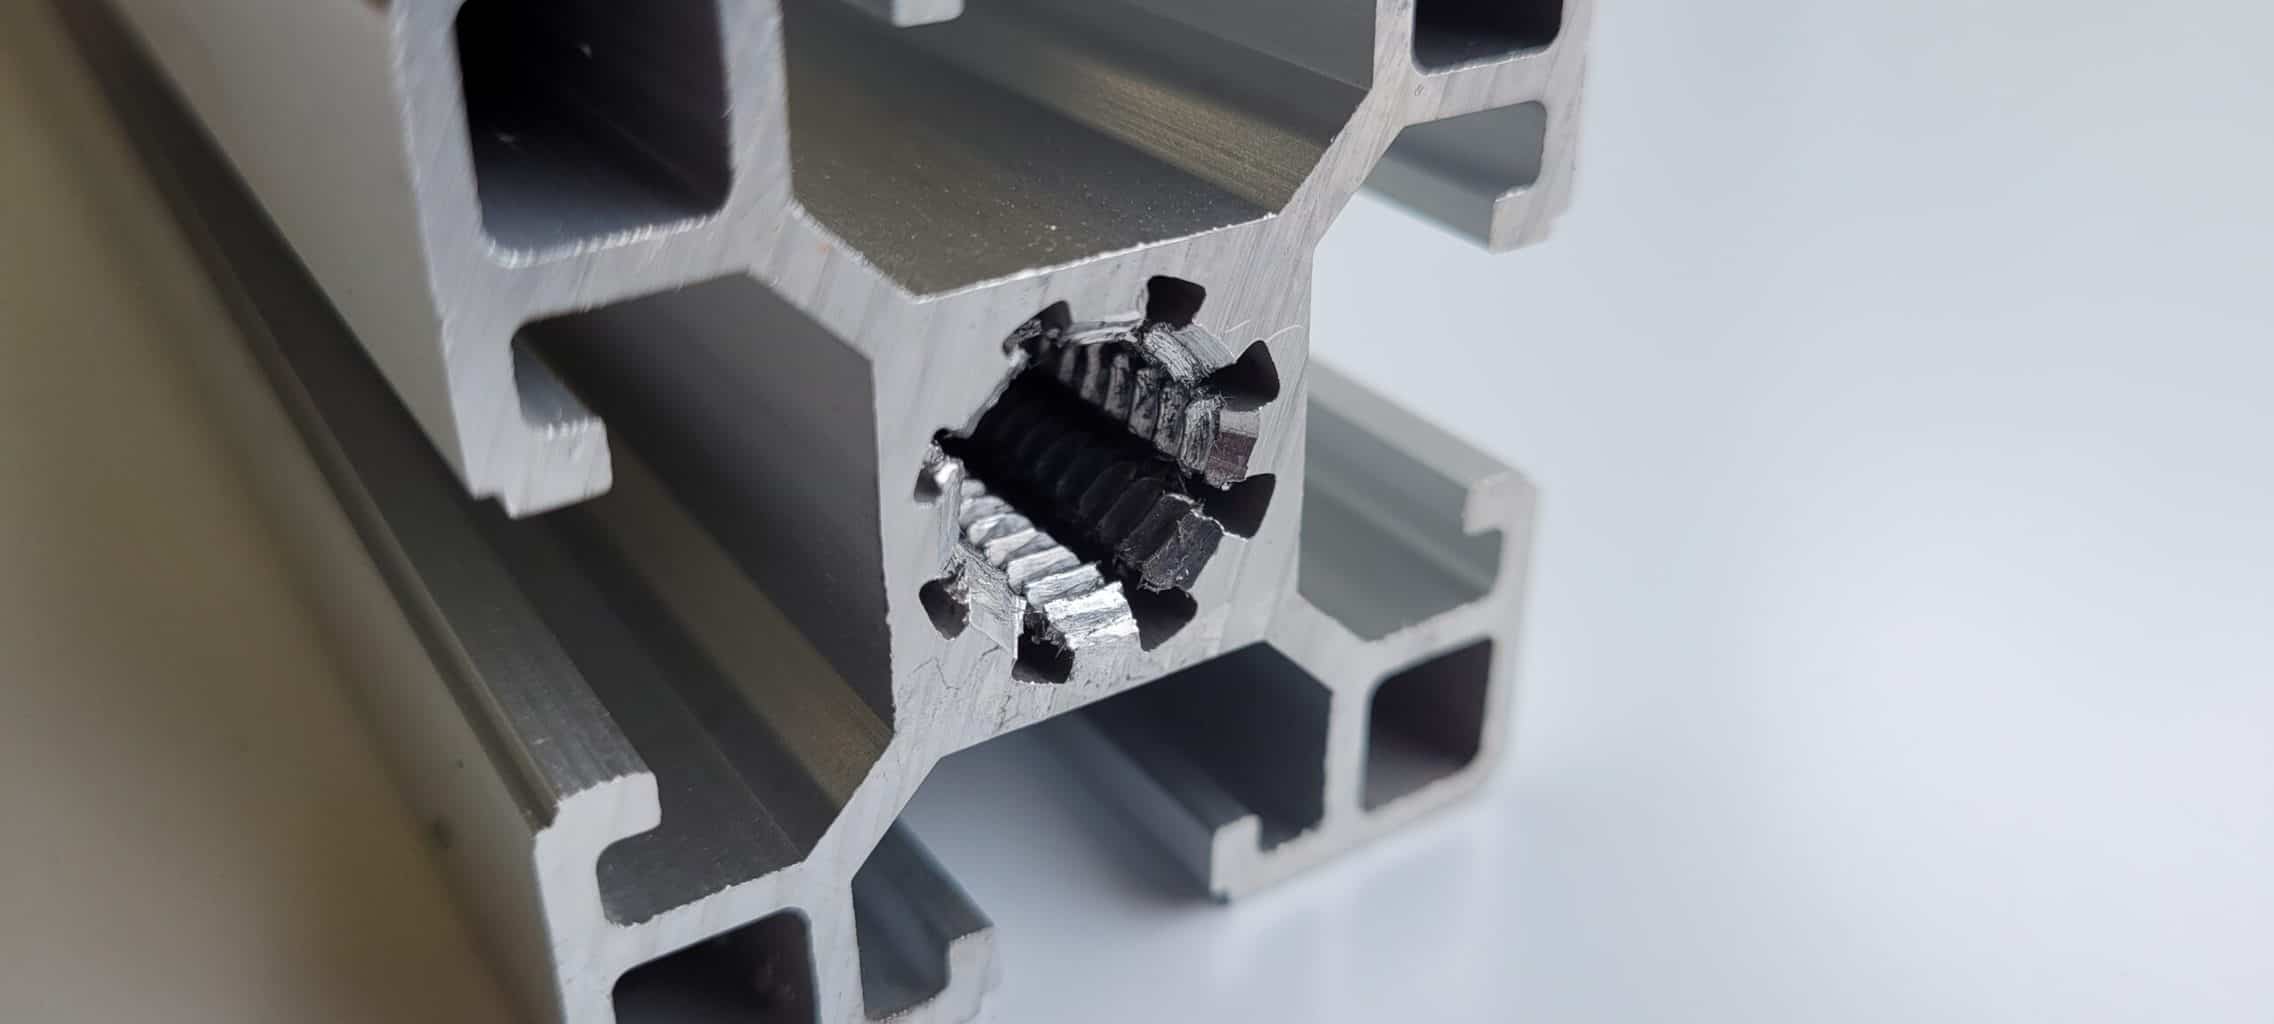
Tap the Central Core (Piece A) Cut your profile to length. Tap the central spline core using the M10 × 1.5 forming tap. Aim for 25-30 mm depth (deeper = stronger). Use cutting compound for clean threads.
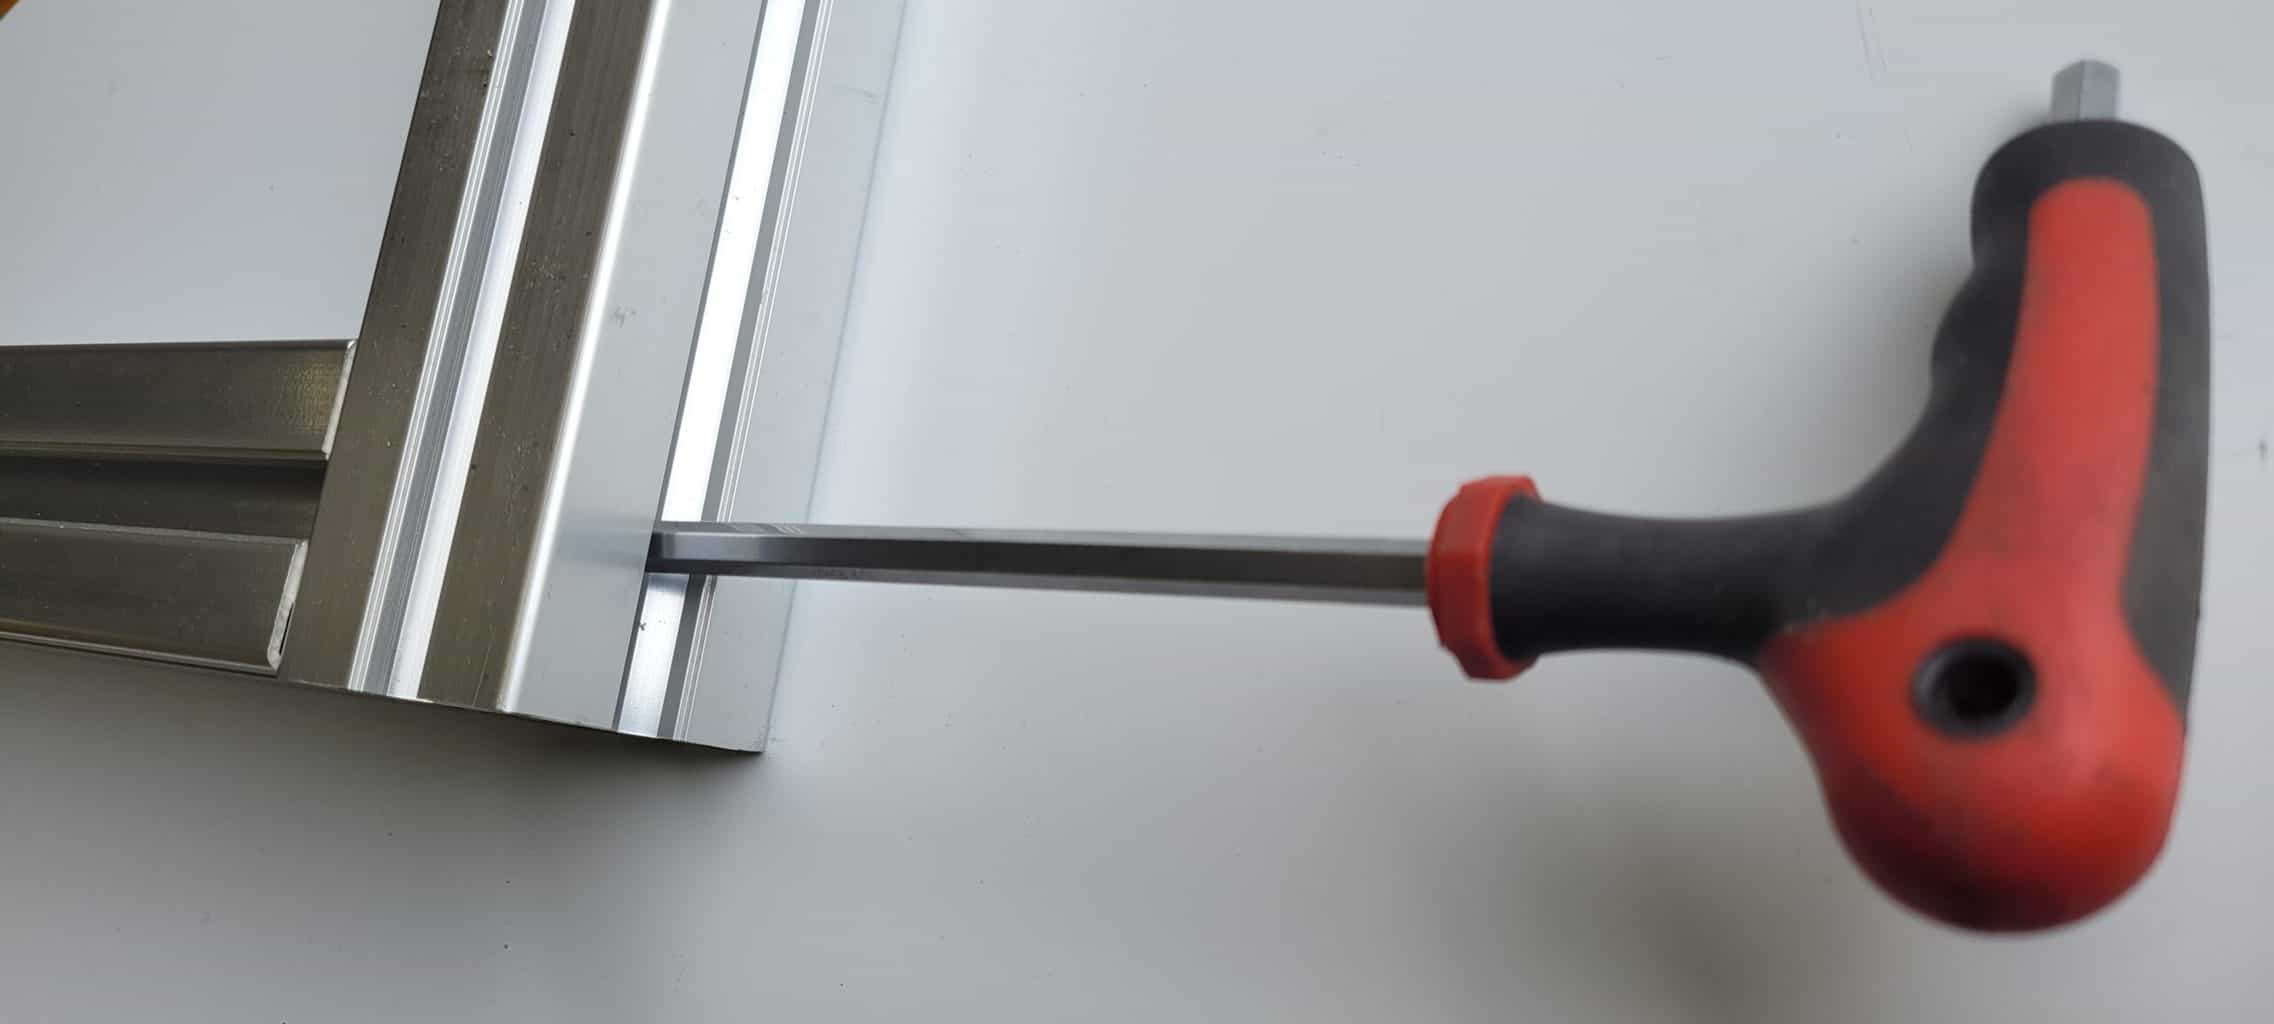
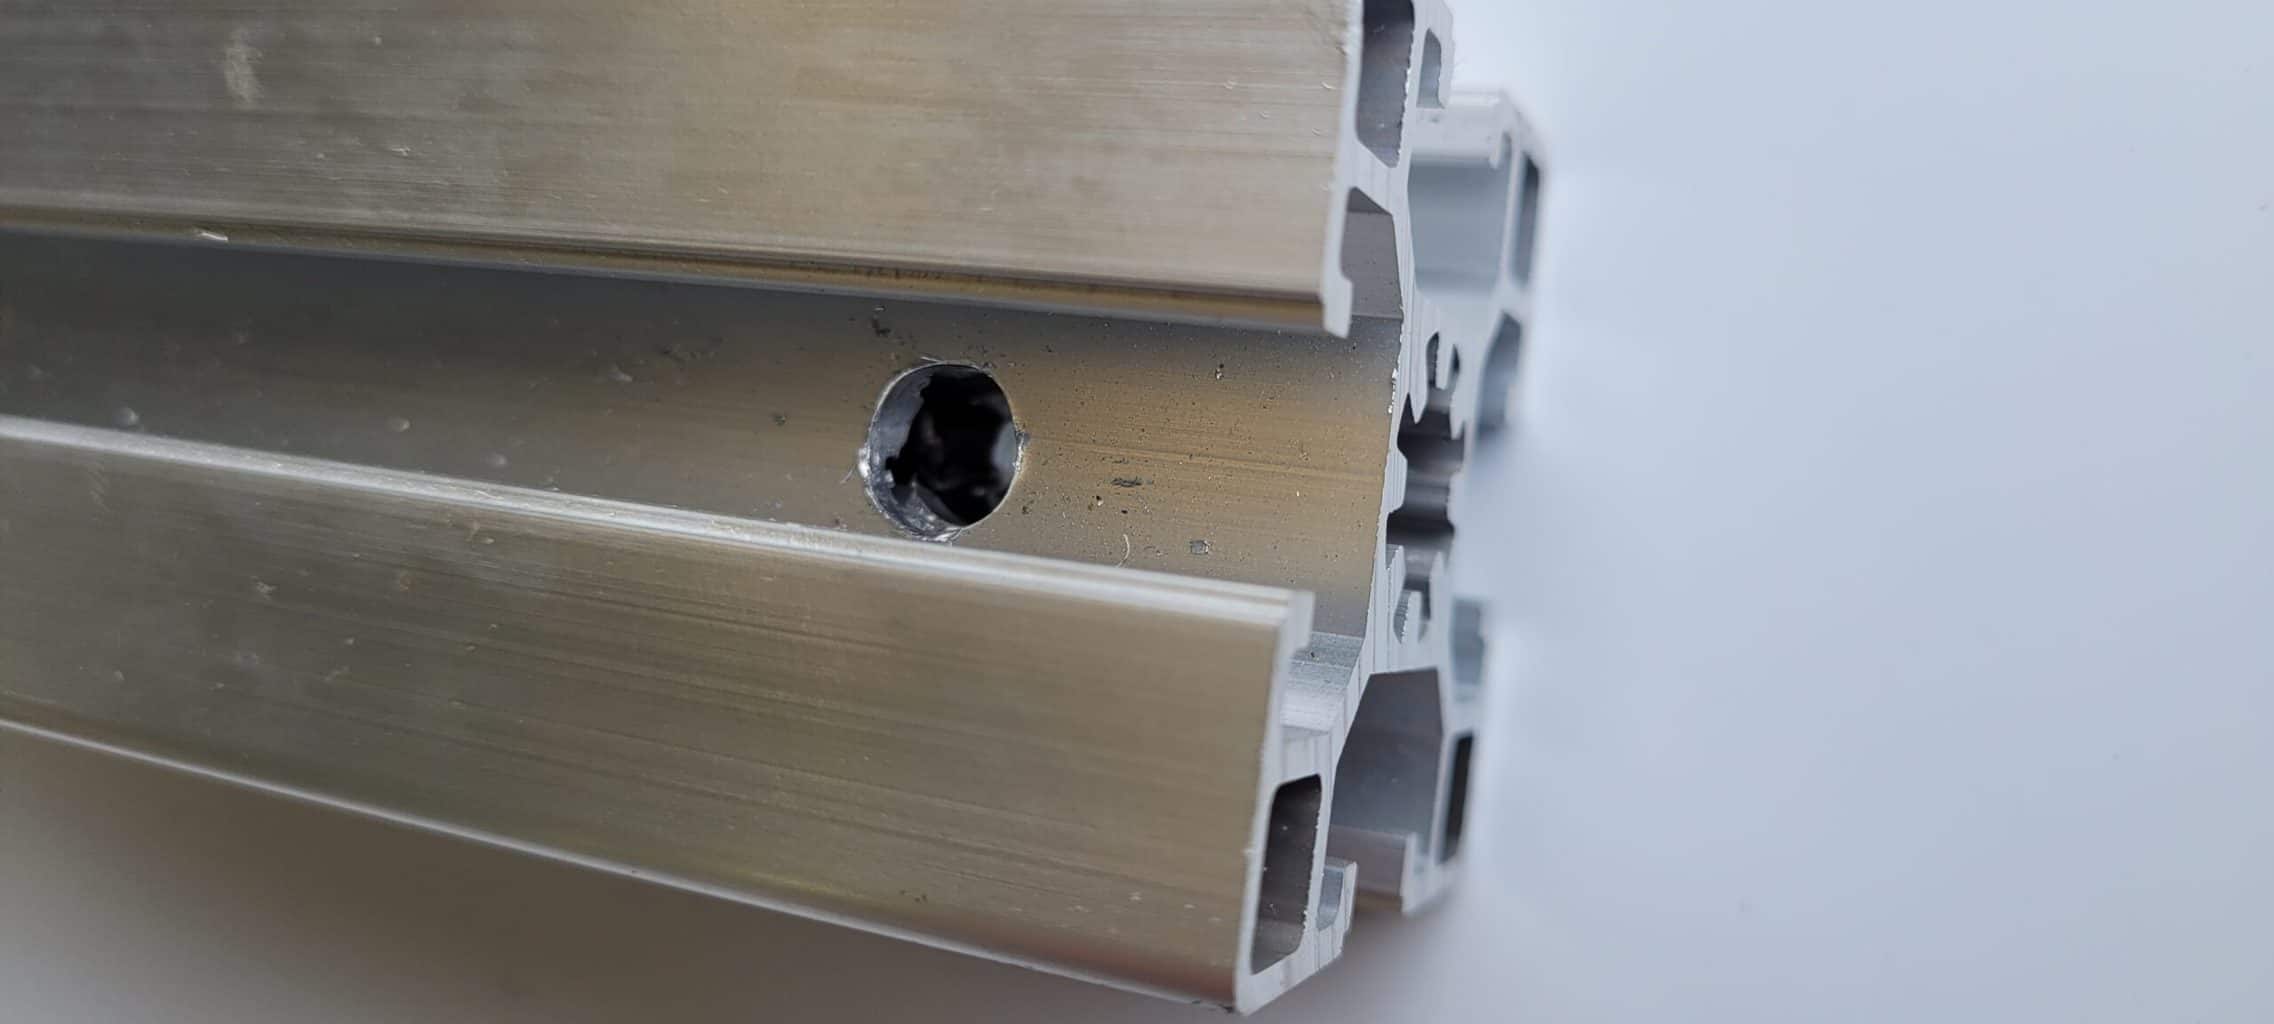
Drill the Access Hole (Piece B) Mark the exact centre of the joint position. Drill a straight 8 mm hole through the wall into the T-slot area. Deburr the edges so the bolt head sits flush. We strongly recommend using a drill press for this process
Insert the Bolt into Piece A Screw the M10 button head bolt with an anti rotation spring clip into the tapped core. Adjust so the head will sit properly in the T-slot.
Bring the 2 sections together in the correct position (Critical Step) Slide the spring fastener and the head of the cap screw into the slot of piece B and move it along the slot until it aligns with the drilled hole
Join the Profiles Slide Piece A (with bolt + correctly fitted spring) against Piece B. Align the bolt head with the 8 mm access hole.
Tighten the Joint Insert the 6 mm Allen key through the access hole. Tighten until the profiles are pulled firmly together. The spring fastener locks the bolt against rotation.
Pro Tip – Multiple Bolts Along One Profile
Screw every bolt to exactly the same depth so all heads sit at the same position in the T-slot. Test-slide the profile before final tightening to avoid jamming.
Additional Notes
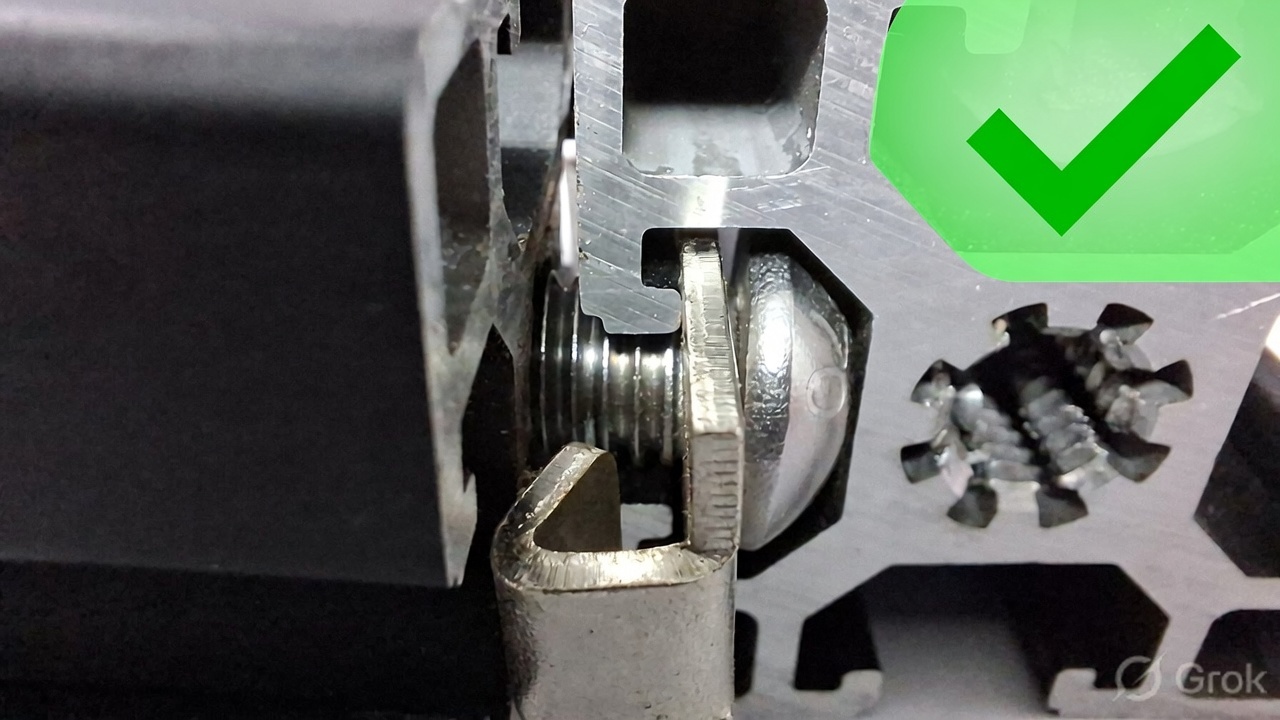
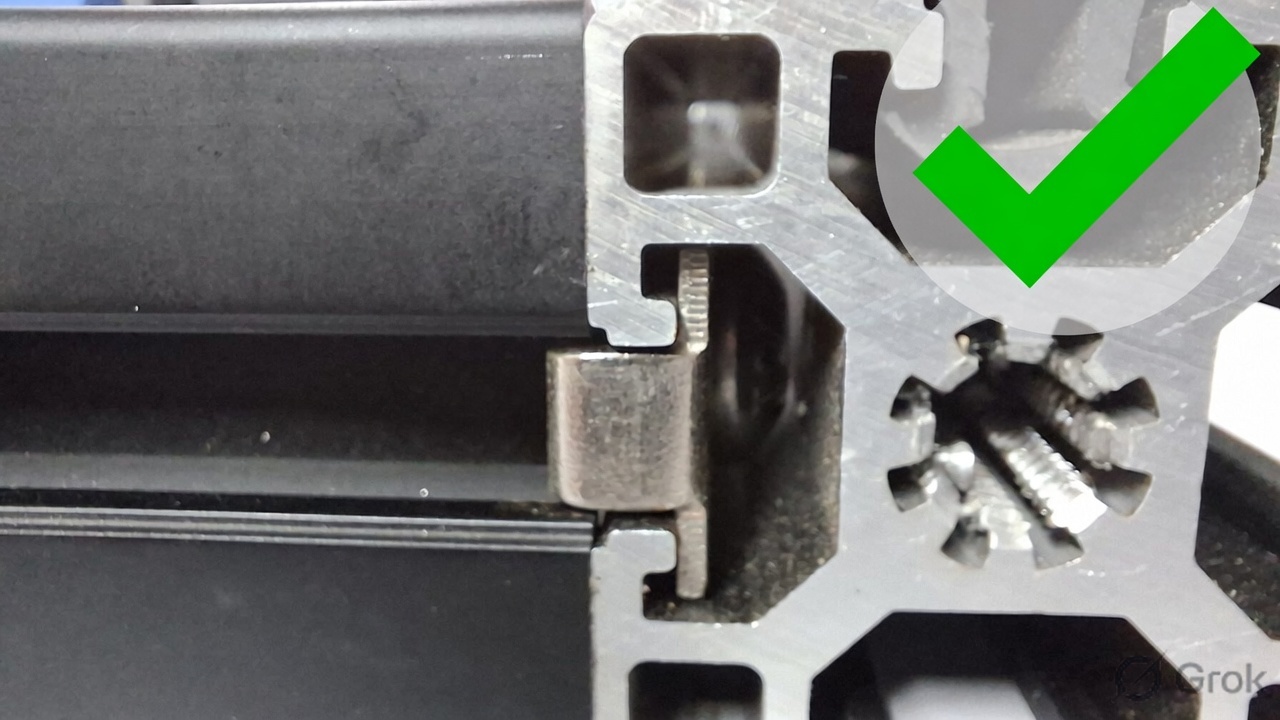
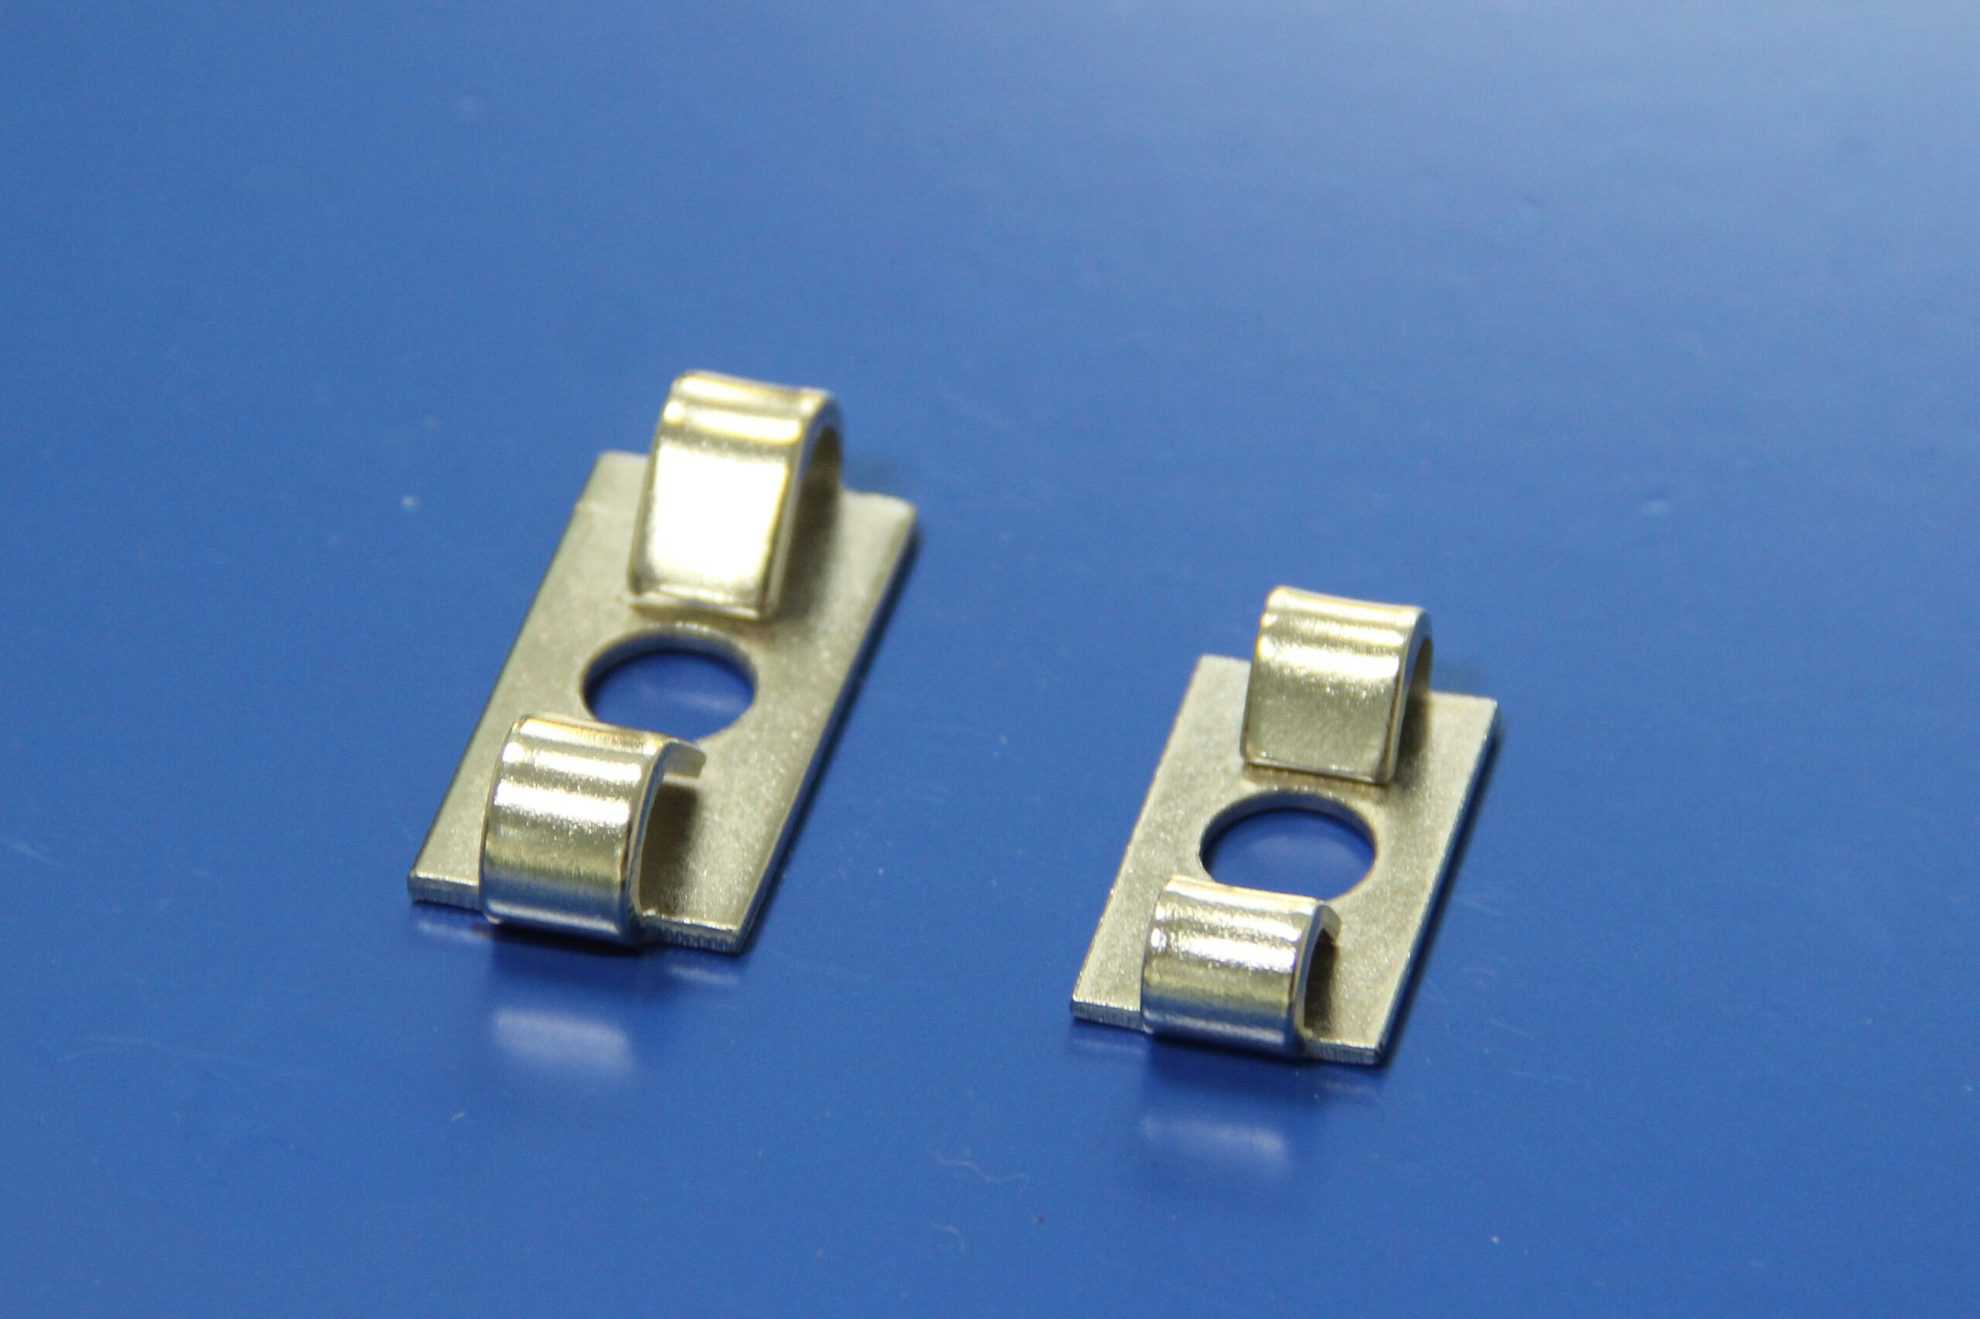
Correct Position

- Spring sits inside the same T-slot as the bolt head
- Parallel to the slot, gripping the walls when tightened
- Located between bolt head and profile (not between profiles)
- The 2 tabs protruding from the spring clip face away from the head of the cap screw
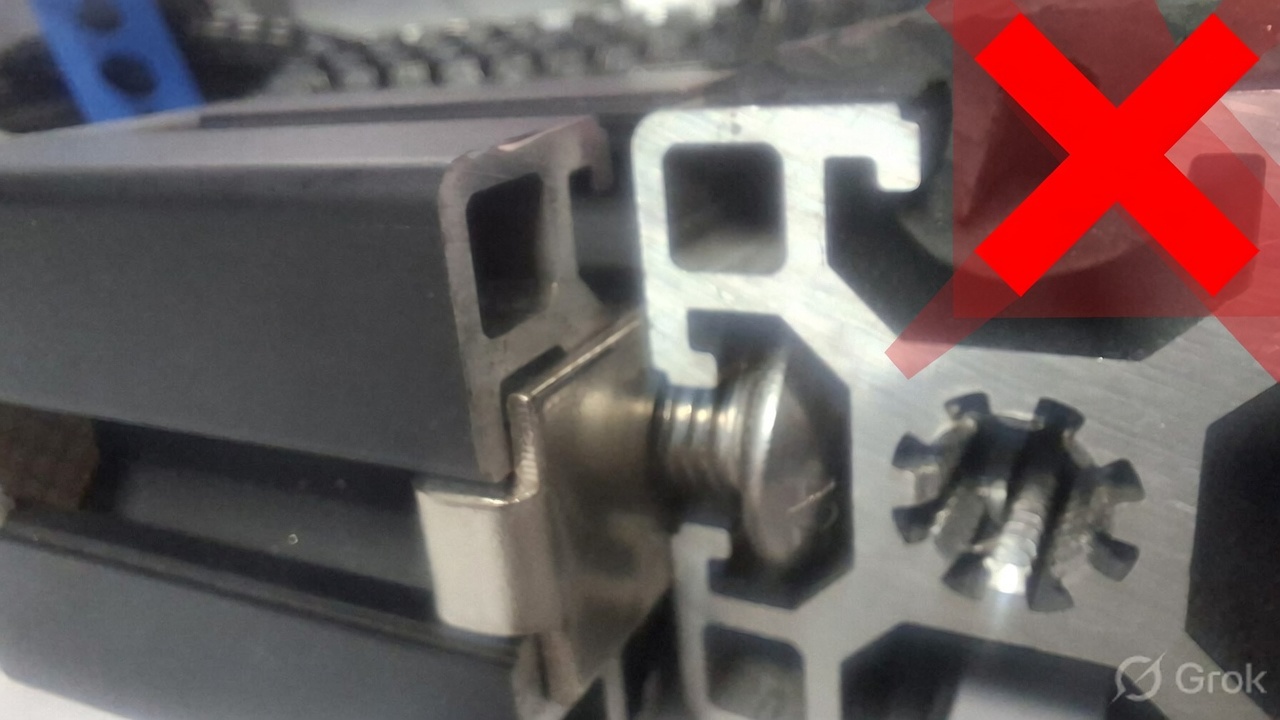
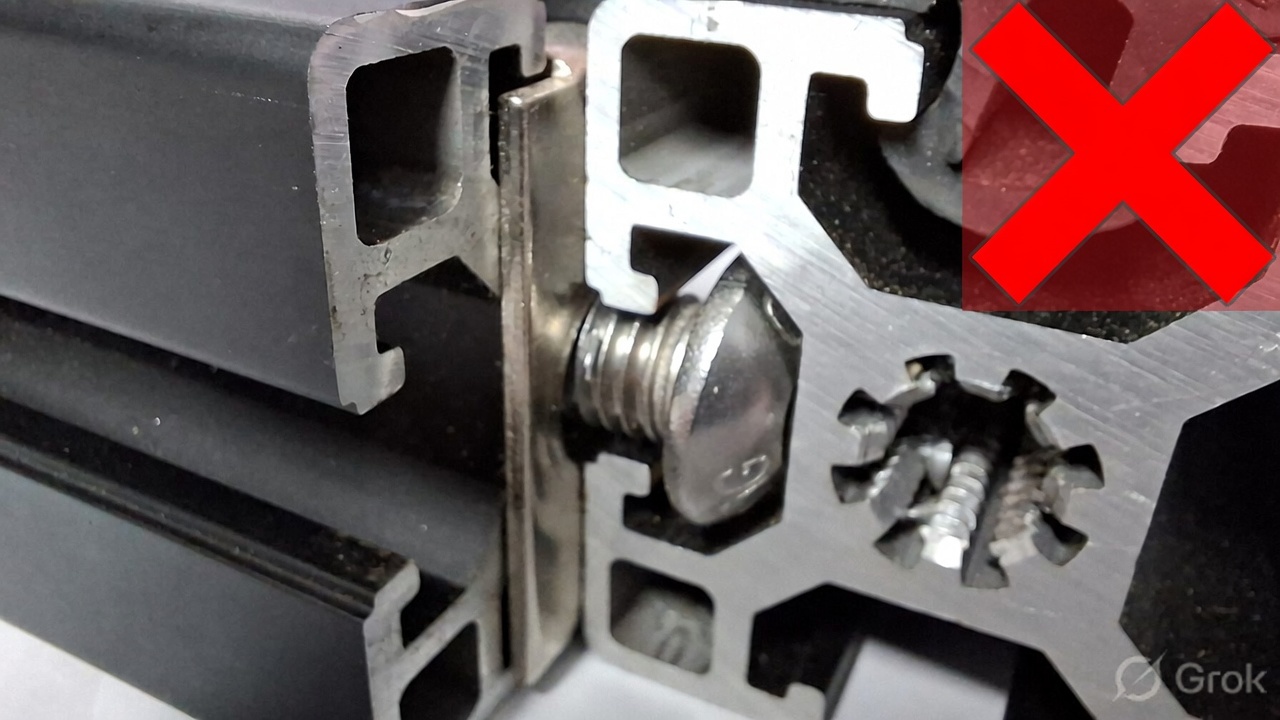
Common Mistakes
(Avoid These)- Spring placed between the two profiles
- Spring rotated 90° to the slot
- Spring flipped upside down with tabs facing toward the head of the cap screw

 (Avoid These)


